Other articles in this series
OBSERVING
WITH A TELESCOPE FOR THE FIRST TIME
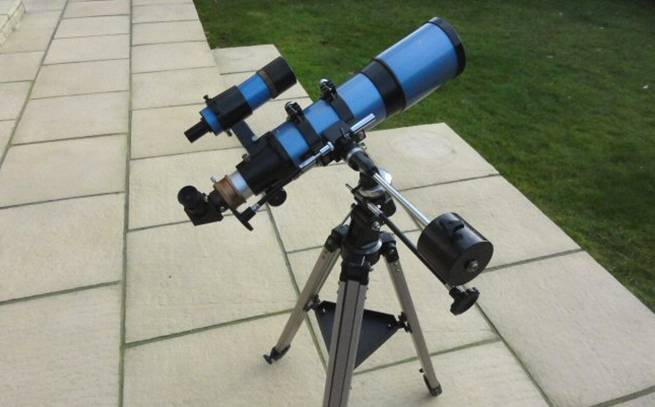
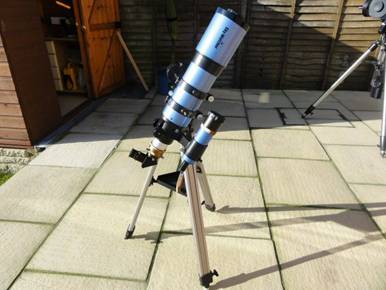
The telescope referred
to in this article A Skywatcher Startravel
102
First and very
important is to dress to keep warm even on a mild night. The cold can soon begin to spoil the evening
if it is not kept out from the start.
If possible the
telescope should be set up on a paved area as this prevents the tripod legs
sinking into soft ground and avoids slipping in the dark. It would also be preferable to have the
telescope overlooking a grassed area because there will be less heat turbulence
from the grass. The edge of a patio or
on a path would be a good position.
Brick walls and
buildings close to the observing position can retain heat from sunshine during
the day and cause heat convection currents in the cold night air. Moving air currents can cause shimmering and
degradation of the image.
Avoid lights that
shine directly on to the observing position especially from the south. If there are unavoidable lights then set up a
screen using canes and sheets or towels to prevent the light shining directly
into the observers eyes.
Set up at least 30
minutes before the intended observing start time. This gives the telescope time to cool down to
the ambient temperature and produce good images.
Keep the dust cover
on the telescope until it is time to start observing. It will help to avoid dew forming on the lens
of a refracting, Schmidt-Cassegrain or Maksutov telescope.
Make sure all the
equipment that might be needed is to hand before starting. This is to avoid going indoors and spoiling
the night vision. It takes about 20
minutes for our eyes to fully adapt to the dark but less than a second to lose
it.
If a star chart is to
be used only use a fairly dim red light or else the long sought after full dark
adaptation could be lost.
If possible use a
chair at the telescope it is more comfortable and steady. It is more difficult to stand still to look
through the eyepiece than it is to sit still especially for prolonged periods.
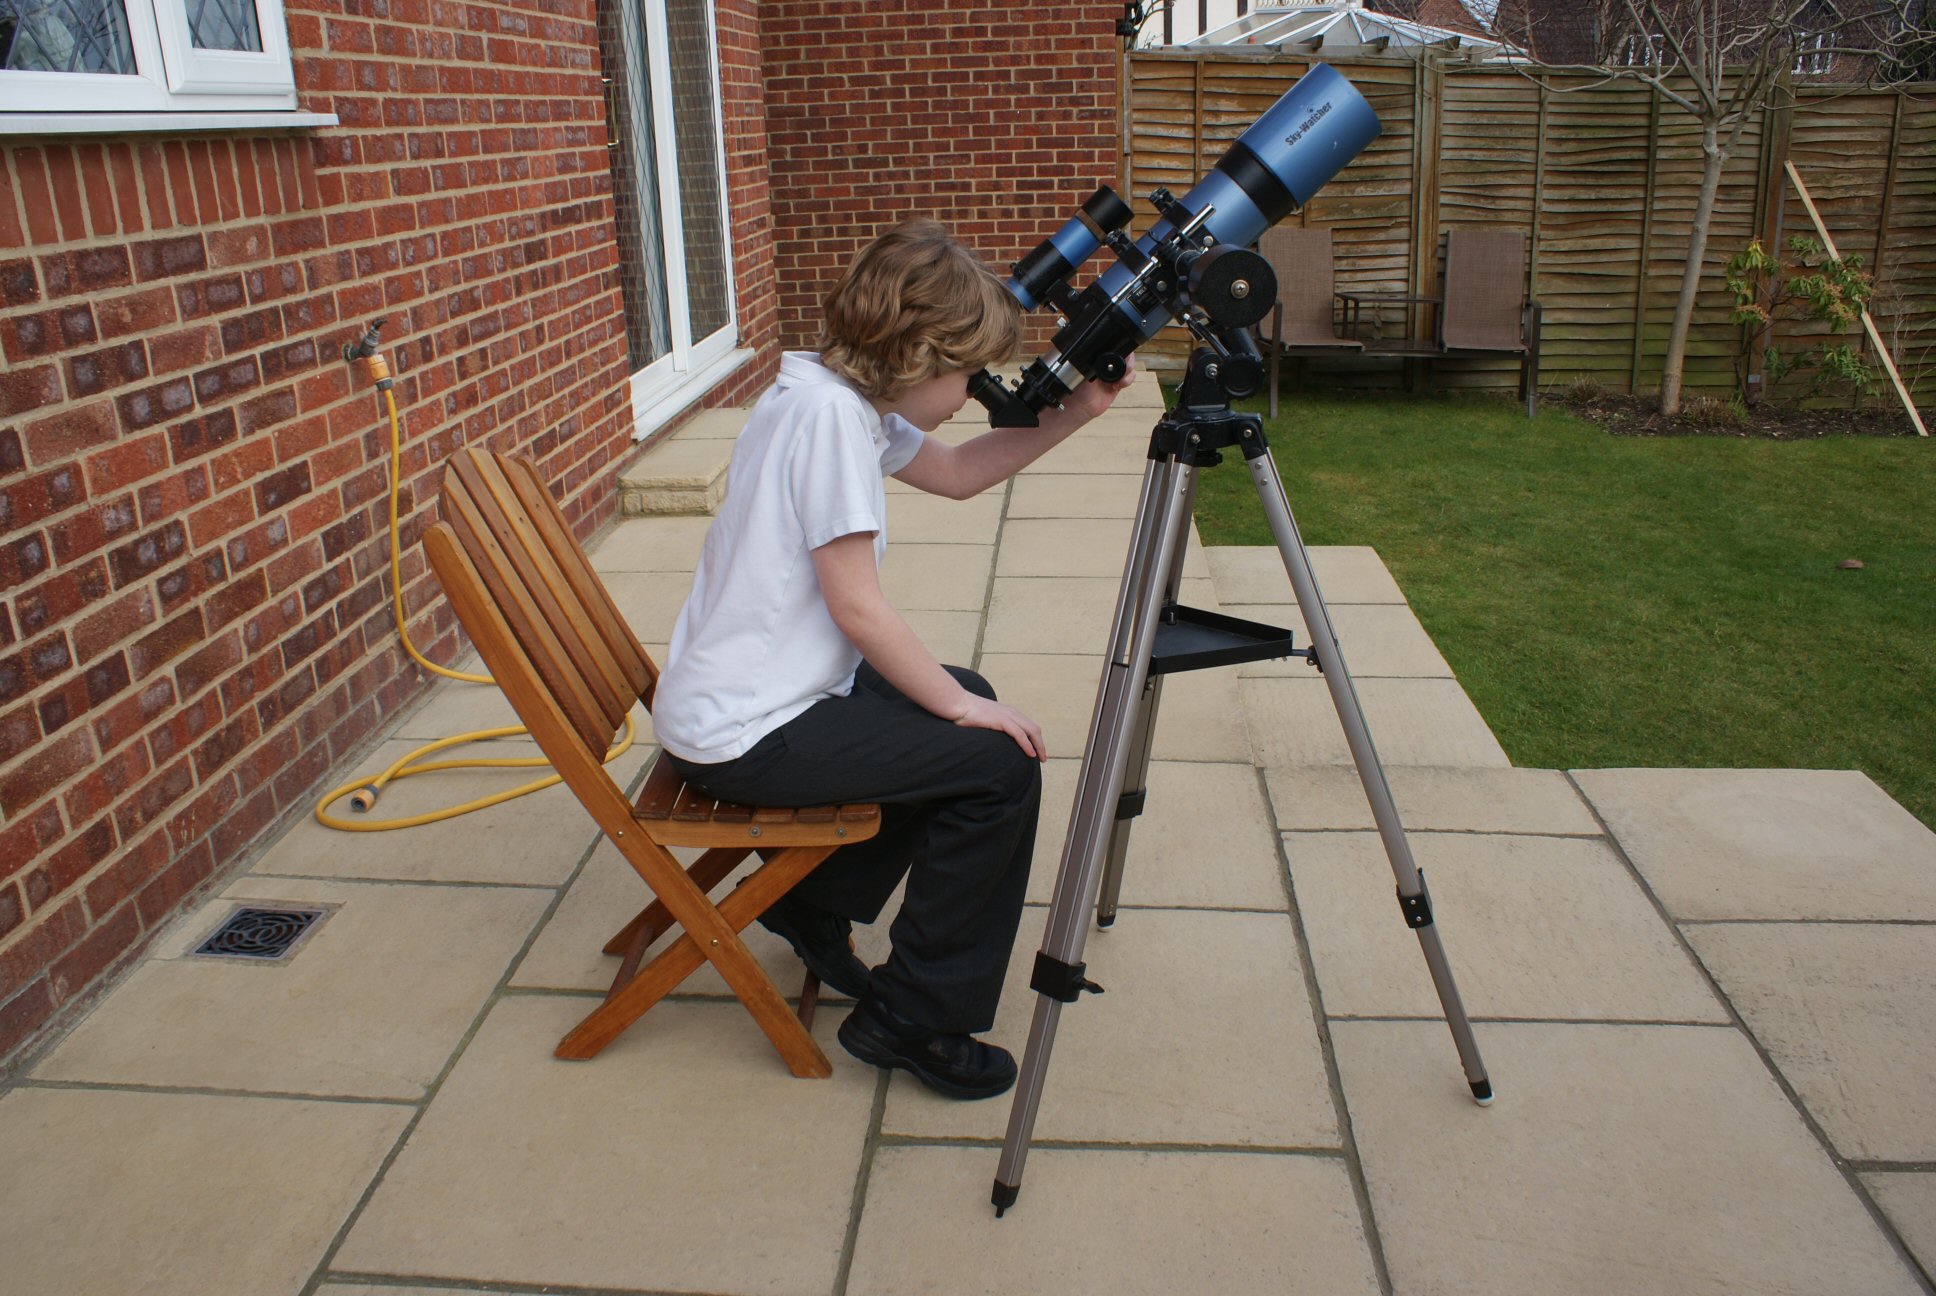
Ollie demonstrating a comfortable position for viewing
Now it is time to
think about setting the telescope up ready for observing. In the previous article (Setting up your new telescope) it was suggested that
the telescope is set up about 30 minutes before starting serious
observing. This means it should be put
outside at least, even if not set up correctly at that time. It takes this time for the telescope to cool
down to the ambient temperature outside.
Differential temperatures can cause degradation of the image and the
telescope will not perform as well as when it has acclimatised.
Detailed setting up
procedure was discussed in the previous article (Setting up your new telescope) so it is assumed
that this has already been done. However
some setting up is required every time before starting to observe. The two basic setting up operations are
aligning and levelling the telescope assembly.
If simple optical observing is to be carried out, approximate levelling
and alignment will be good enough. If astro-imaging is to be attempted more accuracy will be
required and this will be covered in later articles.
First we must check
the alignment of the finder. Fit a low
power eyepiece (20mm or 25mm) into the focuser unit. Locate a bright star or planet and aim the
telescope at this object. If the finder has already been aligned on a distant object during the day then used the finder to locate the bright object. If the finder has not been roughly aligned look along the
telescope tube, release the clutches and roughly align the telescope on the
object. Gently move the telescope around
while looking through the eyepiece until the object appears. Lock the telescope clutches. Use the slow motion drives to centralise the
object in the eyepiece. Look through the
finder and use the adjusting screws to centralise the object. Re-centralise the object in the main
telescope and adjust to centralise in the finder again. When alignment is complete the finder is
ready to use.
Alignment can be carried out using a magnetic
compass or position the telescope so that the Right Ascension (RA) axis of the
mounting is pointing approximately towards the Pole Star Polaris (See the What's Up section on this site find the location of Polaris).
Levelling can be achieved using a bubble level gauge placed on the
tripod leg spreader or other flat surface on the assembly. Raise the tripod legs to the required
height. Place the bubble level gauge in
position in a north / south alignment.
Adjust the height of the legs until the bubble is centralised. Reposition the bubble level gauge east / west
and adjust the legs. Repeat until level
is achieved.
For very approximate alignment (if no drive
motors are fitted) a compass can be used to check the polar alignment. Loosen the hand-nut that secures the mounting
to the tripod. Rotate the mounting until
the RA axis is aligned with the north point of the compass needle. Re-tighten the hand-nut that secures the
mounting to the tripod. Any misalignment
can be compensated for using the drive knobs when tracking an object as it
appears to move across the field of view.
Finer alignment can be achieved by carefully
aligning the telescope on Polaris. The
mount must first be levelled. Check that
the RA angle adjustor is correctly aligned on 51.5°.
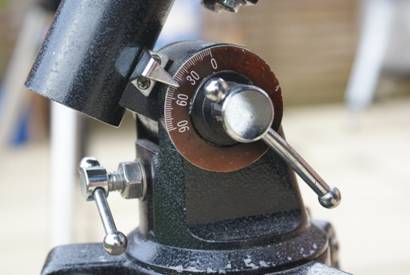
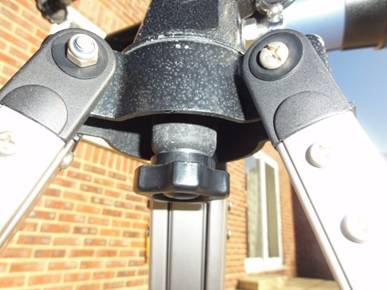
The RA angle
adjustment mechanism on an EQ1 Mount
With the telescope tube pointing south (align
with the compass) lower the telescope tube until it looks level with the
ground. Position a bubble level gauge on
top of the tube (it can be secured using elastic bands, Velcro or adhesive
tape). Adjust the telescope tube until
it is horizontal as shown by the bubble being central in the gauge and lock the
Dec. Check the Declination (Dec) dial
and confirm that 38.5° is aligned with the indicator pointer. Release the Dec lock and raise the telescope
tube until 90° is indicated on the dial.
Look through the finder (which is now rather inconveniently
up-side-down) and Polaris should be positioned in the view of the finder.
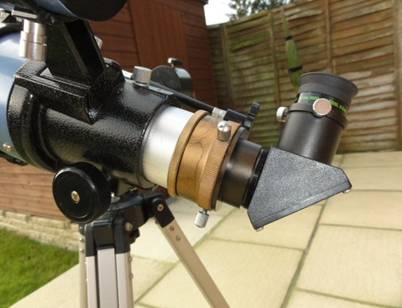
The Declination (Dec)
Indicator Barrel
The telescope pointed
at Polaris and with diagonal rotated
NOTE The setting angle of 38.5° is the latitude
setting for Newbury UK (51.4° rounded t0 51.5°) subtracted from 90° to give the
angle between our horizon and Celestial Equator. This angle is actually -38.6° below the
celestial Equator and where our telescope tube should be horizontal.
Centralise Polaris in the finder as
follows: Loosen the hand-nut that
secures the mounting to the tripod (see the picture below). Rotate the mounting until the Polaris is
centralised east / west. Re-tighten the
hand-nut that secures the mounting to the tripod.
The mounting securing
hand nut
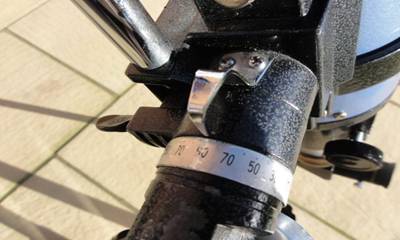
Loosen the locking device on the RA angle
adjustment mechanism (this may be a clamp or a lock-nut on the adjusting
screws (see the 4th picture above). Screw the adjusting screws in or out to raise
or lower the RA until Polaris is centralised north / south then lock RA
adjuster. (This may be necessary if the
RA dial is not very accurate.)
Support the Diagonal
(the 90° mirror assembly on the focuser) and loosen the securing screws. Rotate the diagonal through 180° and tighten
the securing screws (See the second image above). This will allow the focuser to be accessed
and fit a low power eyepiece (20mm or 25mm) into the focuser. Polaris should be in the field of view. Finer alignment adjustment can be made by
centralising Polaris in the field of view of the eyepiece by repeating the
adjustments outlined using the finder but this should not be necessary for
optical observing. Return the telescope
tube to face south and remove the bubble levelling gauge.
For the first
observing session it is a good idea to start with Moon if it is around. It is large and bright and is therefore easy
to find. The Moon may well be out of
focus and may even be so far out of focus that appears as just a bright
light. Rotate the focuser knob in one direction
and then the other until the Moon appears clearer.
The focusing unit
showing adjusting Knobs
Look at it for a few
seconds then make small adjustments to the focus until it is perfectly clear. It will be necessary to adjust the RA drive
every few minutes to bring the Moon back into the field of view. It will move quite quickly across the field
of view due to the rotation of Earth on its axis. The Moon is very bright especially if it is between
half and full. To lessen the glare it is
possible to cut down the amount of light entering some telescopes by fitting
the dust cover and removing the small cap to allow a less light to enter the
telescope.
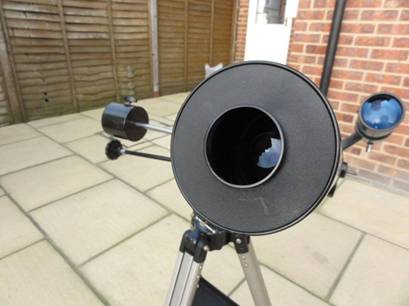
The Dust Cap fitted but with the small
cap removed
Once the focuser
adjustment has been completed have a good look at the Moon and the many
features it has on view. Look especially
near the Terminator the dividing line between the light (daytime) side and
the dark (night) side. Here the shadows
are long and pronounced because it is sunset or sunrise. This makes features like craters and
mountains stand out with greater relief and look almost three dimensional.
Use the RA and Dec knobs to move the image
around the field of view to get used to the way the telescope is moved. Move the Moon out of view then use the finder
to re-centralise it.
When a little
experience has been gained in moving the telescope around it is time to up the magnification. Using the RA drive
move the Moon back across the field of view so it can drift across the full
field of view. Carefully release and
remove the low power eyepiece and fit a higher power (10mm). Look into the eyepiece and re-focus if
necessary. The objects in the field of
view will now appear twice as large and more detail can be seen.
The disadvantages
are: the Moon will appear to wobble more and it will move twice as fast across
the field of view. We cant do anything
about the wobble due to the movement of air in our atmosphere but we can
help. To lessen the wobble of the
telescope use this technique to track the feature as it moves across the field
of view. Move the feature as far as
possible to the side where it starts the drift and let it drift right across
without touching the telescope until it reaches the other side. This stops much of the wobble created by the
observer.
Another hint here is:
put the eyepiece that is not being used in your pocket, preferably a trouser
pocket to keep it warm. This helps to
stop condensation forming on the lens when you next use it.
The next objects to
look out for are the planets. Jupiter,
Venus, Mars and Saturn are the easiest to find and the most spectacular. They are also perfect for aligning the finder. Jupiter is the best for detail, it is large
(for a planet) and colours can be seen in the cloud belts. The four bright moons can be seen to move noticeably
during one observing session. Saturn is
impressive because of its magnificent ring system. The rings will be visible using a 90mm telescope
and possibly a 70mm telescope with a focal length longer than 700mm.
Venus is very bright
and easy to find but the view of the surface of this white cloud covered planet
is bland. To make up for this Venus does
show phases much like our Moon. When it first appears in the evening sky it
is difficult to observe because it is close to the Sun and close to the western
horizon. At this time the planet is on
the other side of the Sun to us and therefore appears small but displays a nearly
full disc. Venus gradually moves further
out from the Sun and begins to catch up with Earth. The size of Venus appears to grow as it gets
closer but its phase narrows. Eventually
it moves back towards the Sun as it begins its pass between Earth and the Sun
to reappear as a morning object. At this
time it is at its largest apparent diameter and its narrowest crescent
phase. As a morning object it then
becomes smaller and the crescent shape widens until it appears almost full as
it moves back around the far side of the Sun.
Mars is quite small
compared to Venus and Jupiter and appears about the same size as Saturn. It can appear quite a lot larger when Earth
and Mars are at their closest approach.
They were last at the closest point in their orbits in 2003 but will not
be at their closest again until about 2019.
The outer planets
Uranus and Neptune are quite difficult to find but it is possible to see Uranus
in a 100mm telescope and Neptune in a 120mm.
However they appear as rather fuzzy blue stars.
The technique used to
find planets is similar to finding the Moon. Use the finder and a 20mm to 25mm eyepiece to initially find the planet. Then change to a 10mm or less eyepiece to see
more detail. If supplied remove the 10mm
eyepiece and fit a Barlow into the focuser. Insert the 10mm eyepiece into the Barlow and re-focus. This effectively doubles the eyepiece magnification.